Backscratchers
Objective:
To go through the engineering design process, focusing on testing and revising an initial design
Key Words/concepts:
Engineer, strength, weakness, prototype
NGSS Standards:
K-2-ETS1-1. Ask questions, make observations, and gather information about a situation people want to change to define a simple problem that can be solved through the development of a new or improved object or tool.
K-2-ETS1-2. Develop a simple sketch, drawing, or physical model to illustrate how the shape of an object helps it function as needed to solve a given problem.
K-2-ETS1-3. Analyze data from tests of two objects designed to solve the same problem to compare the strengths and weaknesses of how each performs.

Overview of Lesson:
During our school’s two week testing schedule, I was unable to see the 3-5 classes on their normal schedule. To make the best use of the time I instead saw the K-2 students who didn’t have to test twice in a row. On earlier projects the two week lag time between sessions was too much to keep the younger students focused on a goal so I hoped that the short time between sessions would sustain their focus on the single project. My overall objective of this time was to address the K-2 NGSS Engineering standards. In reading more about these standards, the general idea was that Kindergartners could master the first one, 1st graders could master the first and the second, and 2nd graders should be able to demonstrate all three. The hardest part became finding a new task for students to complete to demonstrate these standards. Any search for engineering projects turns up only bridges and towers, which explains why people generally are not excited to teach engineering.
Finally, I found two resources at TeachEngineering.org and CIESE.org about teaching the engineering process by building backscratchers. This is an ideal example because students can be challenged to solve a real life problem, you don’t need specialized materials, and students can very quickly test and redesign as needed. I adapted my lesson from these two sources to suit the needs of my students.
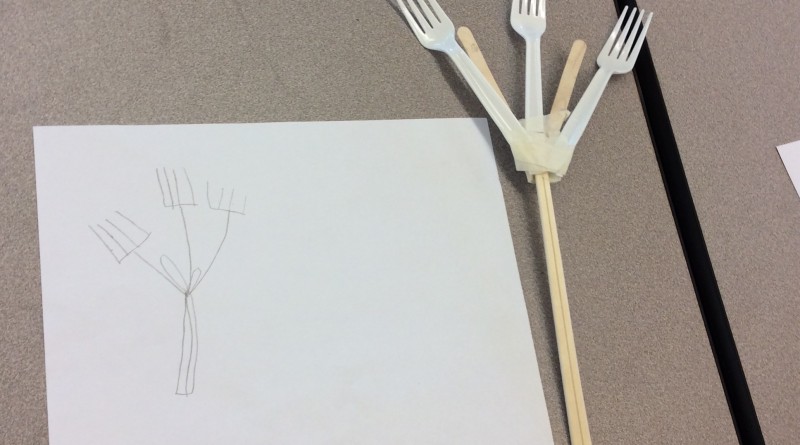
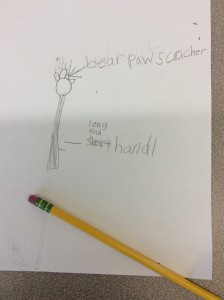
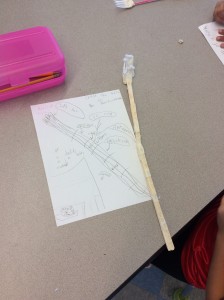
I began by reviewing a topic from the beginning of the year of “What does an engineer do?” The students definitely needed a reminder of this one. From there we thought about how you could solve the problem of having an itch on your back and I showed them a dog and a bear scratching an itch. To force them to do the design process, I first had them draw an idea on paper and gave each class a good 5 minutes of quiet drawing time. I had shown them how to label their drawings so they were prompted to add details and labels to their work. I stressed that this was just an idea and that they could change it if they needed to.
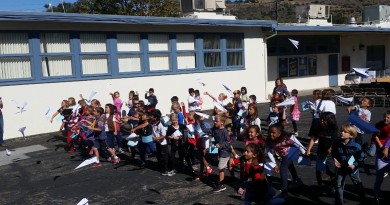
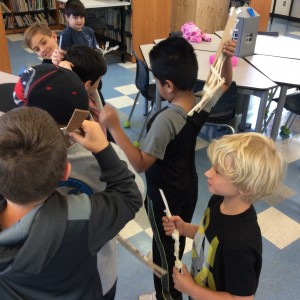
Once drawing time was over the students were allowed to begin building. The drawing ahead of time made a tremendous difference. The students immediately knew which supplies they wanted and got right to building something similar to what they had drawn. The students had about 15 minutes to build this first day and then were able to resume their building for about 5 minutes on the second day. All throughout the building process I kept reminding and encouraging them to test their design to see if it would work or not. The largest problem was indeed having parts unsecured or being too sharp, which the students had to take the time to solve for themselves.
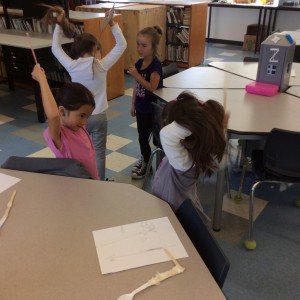
Once building was done I had the students clean up and then went over some sentence frames for talking about their backscratchers. I told them that they would be testing out their classmate’s inventions and would need to give them a compliment about a strength and a suggestion to address a weakness. To get them to pair up and move around I did a grouping strategy that I participated in at CUE with Matt Vaudrey (@MrVaudrey). I had the students first pair up with someone else at their table and exchange backscratchers and words for about a minute. I then got their attention again and had them test someone in the class wearing a different colored shirt, the same colored eyes, and then someone they hadn’t talked to yet today. These sort of forced and quick groupings were quite effective and overall the students were able to talk academically about their projects in that amount of time.
The final conclusion is where I differentiated the most between grade levels. In Kindergarten and 1st, I had some students share a compliment they gave or received and a suggestion they gave or received. For the first graders, their final task was to look back at their original drawing and to improve/correct it. The second grade students stayed paired up with their final partner and wrote down some comparisons. This activity was a bit of a stretch for them so I’d simplify it next time. Students were allowed to take home their backscratchers and diagrams on the condition that they wouldn’t use them as weapons and wouldn’t scratch anyone’s back without their permission.

Materials/Requirements:
Planning supplies- blank paper, pencils
Building supplies- popsicle sticks, straws, plastic forks, knives, spoons, skewers or sandwich picks, chopsticks, pipe cleaners,
Building tools- masking tape, scissors
Conclusions/Reflections for the future:
This lesson did actually work out rather well. The challenge was novel and accessible to the students and did not require an inordinate amount of preparation on my part. The one problem is that now all of these students have done this so I won’t be able to repeat this activity for another three years.
Digital Resources:
Backscratcher Comparison Worksheet – 2nd grade
Idea Sources:
TeachEngineering.org- Invent a backscratcher
CIESE.org- Scratrch my Back